Start off by buying a steampunk corset during a really good sale. Fall in love with it the instant it arrives. Spend a few minutes feeling pleased with your purchase before realizing you have no place to wear it, and nothing to wear it with. Combine this with a sudden and unexpected fascination with cosplay and historical costuming. Start following a 16 year old cosplayer who makes her own costumes. Think to yourself 'How hard can this be? She's 16! Her brain isn't even done developing! I'm 30, have a master's degree, and total control of my fine and gross motor skills!'
Force your fiance to teach you how to use his sewing machine. He made you those Katamari plushies, after all, which makes him like an expert.
During your down time, sketch pictures of what you want the end result to look like. Completely ignore the fact that you don't know how any of the individual items are put together.
Wait until your local fabric / crafting store has a giant sale. Spend way too much money on fabrics. Eventually listen to your fiance when he convinces you to also buy some crappy cheap fabric so you can make practice versions of everything you want to make.
Get home and decide that the first thing you're going to make is the floor length four panel skirt. Except you're going to make a short version with the shitty fabric first. Take some really inaccurate measurements. Waist, hips, length. Try to be off by at least four or five inches. It will add to the fun you'll have later.
Get out your large brown paper to draw the pattern on. The paper comes on a roll, so it will constantly fight you to roll back up. The only thing you have handy is a spray bottle, so lightly spritz it with water and put heavy things on it to weigh it down.
Realize that you can't draw anything on it while it's wet.
Come back a few hours later and draw your pattern. Forget to add seam allowances on the sides. Decide you don't want to draw it again, so just cut it out the way it is.
Fold the pattern in half and lay it on your fabric.
Pin it in place. Stab yourself multiple times with the pins. Use way too many pins. That will help you stab yourself more. Cut around your pattern and unfold.
Do this three more times.
Think about ironing the fabric to get out the creases. Decide it's too hot to turn on an iron. Instead, pin the long side seams together.
Sew everything together. Remember to remove the millions of pins you used. Get tired of being stabbed in the hands and arms. Try to make your lines straight, but fail.
Fail a lot. Once all the long seams are sewn think about ironing them to flatten the fabric. It's still hot, though, so don't actually do that. Fold the material for the waist over. Leave enough room to slip an elastic in later. Pin the crap out of it.
And sew! Leave an opening, somewhere, so you can get the elastic in. Ignore how the material seems to be bunching as you sew. I mean, try to straighten it out a little, but don't try too hard.
Cut a piece of elastic to the measurements you took earlier for your waist. That guarantees it'll be 4 inches to long. Attach a safety pin to one end and slip it through the opening of the waist band. Use the safety pin to guide it all the way through, till it comes out the other end. Pin the ends together and try it on. Discover that it is way too loose. Cut it so it actually fits and sew the ends together. Do a really shitty job of sewing it. It's not like anyone will ever see it.
Put on your skirt and stand on a chair. Have your fiance pin up the bottom hem. Give him only vague instructions and forget that he's only ever sewn plushies, and doesn't know anything about making clothing. Start sewing. Realize that the hem is crazy uneven, but don't stop. Just keep going. Also, fuck up sewing a straight line again.
And you're done! At this point you should have developed a Stockholm-syndrome like affection for your skirt, so declare that you love it. Force your fiance to say nice things about it. Make it a part of your wardrobe.
Now that you are an expert on sewing, start getting ready to make the rest of your outfit!
Showing posts with label pics. Show all posts
Tuesday, July 9, 2013
Tuesday, January 31, 2012
How to make a peacock feather Barrette
First things first, here's what you will need:
The picture quality isn't very good, so here's a list: You will need two peacock feathers (just the eye part, actually, so if you have whole feathers feel free to cut off the ends), some rhinestones (amount may vary, I use 5 for this design), a barrette (purchase at any local craft store), felt, a hot glue gun with glue, and scissors. Optional: Pliers.
Now you want to cut some felt.
Place your barrette on the felt to measure how much you'll need.
Then cut to size
Now smooth out the edges of your felt square to make it more of an oval.
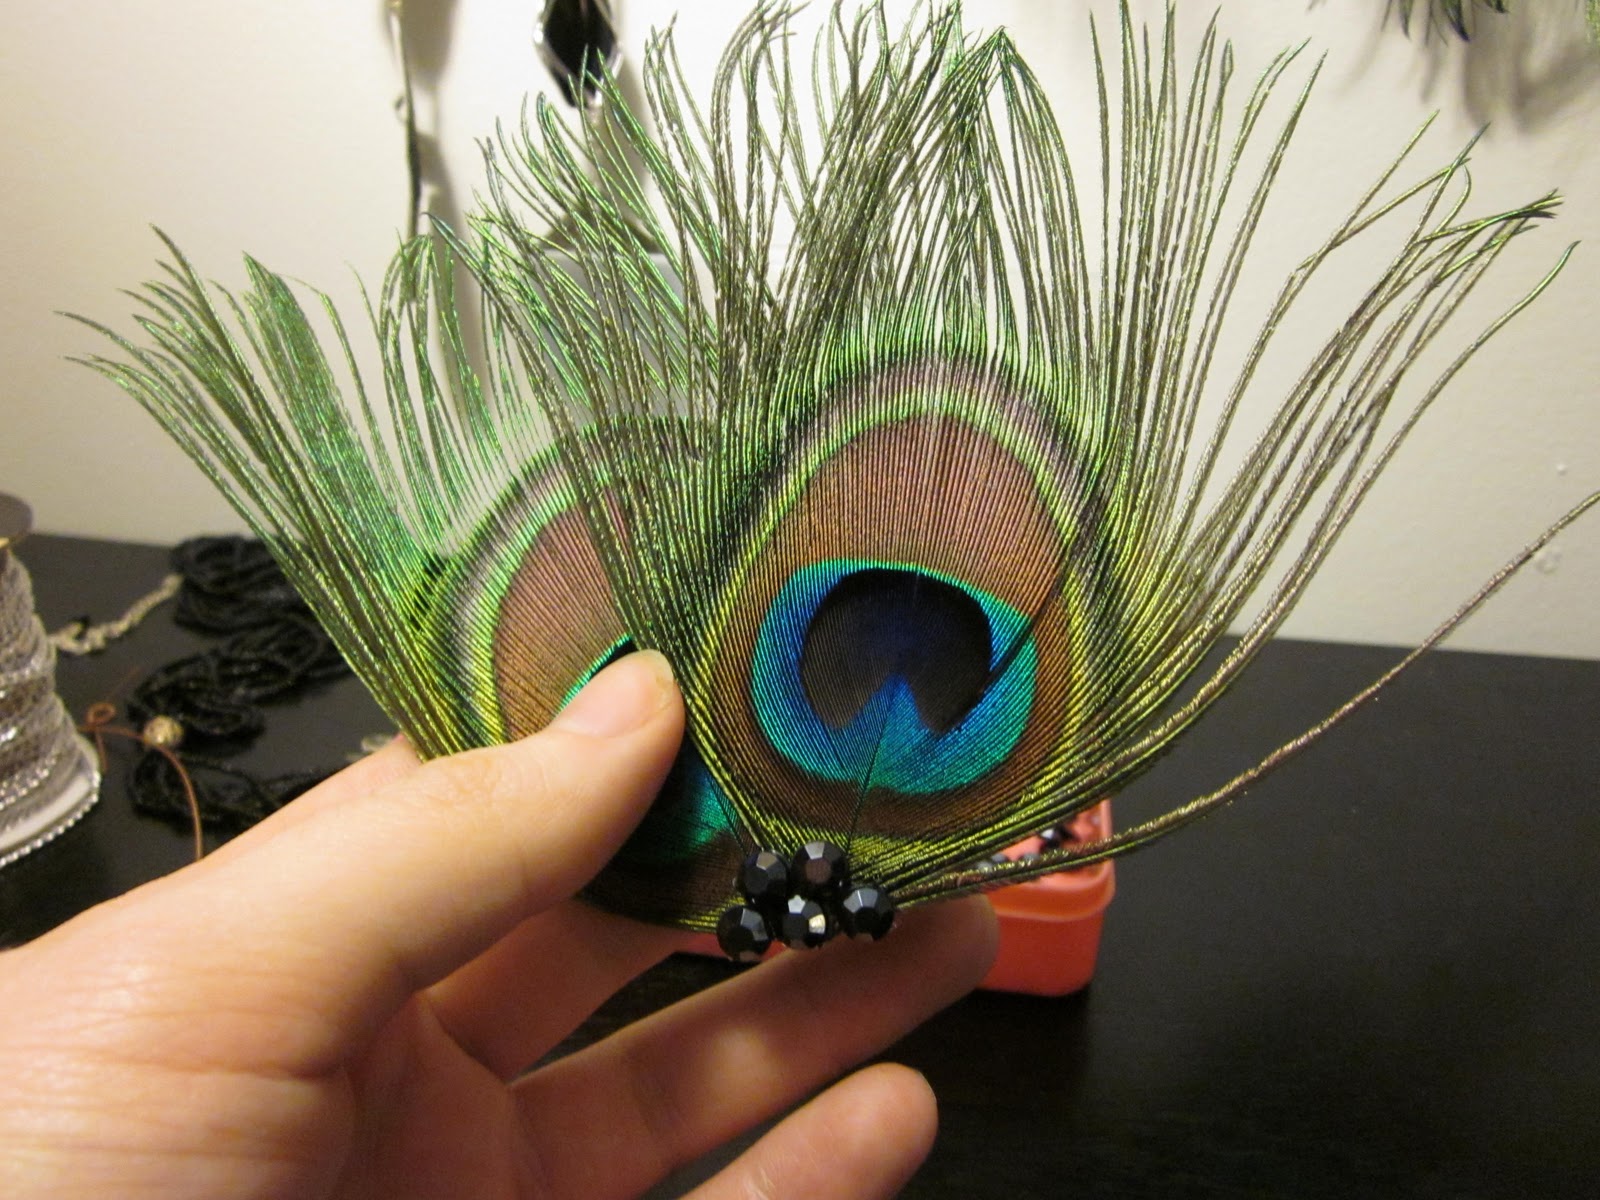
Don't worry if it's not perfect, you'll make yourself crazy trying to get it just-so. Put the clip and the felt aside and grab your peacock feathers. You want to cut all of the extra away from the 'stem', leaving only the eye. It should go from something like this
To something like this
Do this with both peacock feathers. Now play with your feathers to get a feel for how you want them to look on the barrette.
Grab your felt and one of your feathers. If your feathers are going to overlap like mine, start with the one that will be on the bottom. BEFORE adding any glue, lay it on the felt to get a feel for where the glue should go and how to get the feather to sit just where you want it. Once you put the glue down you're stuck (get it?). So, practice.
It's time for the glue gun! I don't know about you, but I've always loved these things, despite all the burns I've gotten from them over the years. Put down one diagonal stripe of glue roughly where the center line of the feather will be once it's placed.
You don't have much time before the glue cools, so place your feather fast! Press it gently to make sure it stays, but don't wiggle it around. Feathers are delicate, and you can get breaks in the eye pattern.
Now, do the same for the second peacock feather.
You are now ready for the rhinestones. Once again, before you glue anything, place them on the feathers to get an idea for how you want the pattern to look. I also like to use pliers to pick them up, as my fingers tend to drop things a lot.
Put a little dab of glue on the flat side of the rhinestone and place it on the feather.
Lather, rinse, and repeat for the rest of your stones.
Put your peacock feathers pretty-side down, so the felt is facing up, and grab your barrette. Put a line of glue across the barrette, put it on the felt and press down.
For added security, cut a thin strip of felt and slide it under the part of the barrette that sticks out, and glue the ends down.
And you're done! The end result should look something like this:
That's it! For nicer photos of the final product, check out my etsy store.
The picture quality isn't very good, so here's a list: You will need two peacock feathers (just the eye part, actually, so if you have whole feathers feel free to cut off the ends), some rhinestones (amount may vary, I use 5 for this design), a barrette (purchase at any local craft store), felt, a hot glue gun with glue, and scissors. Optional: Pliers.
Now you want to cut some felt.
Place your barrette on the felt to measure how much you'll need.
Then cut to size
Now smooth out the edges of your felt square to make it more of an oval.
Don't worry if it's not perfect, you'll make yourself crazy trying to get it just-so. Put the clip and the felt aside and grab your peacock feathers. You want to cut all of the extra away from the 'stem', leaving only the eye. It should go from something like this
To something like this
Do this with both peacock feathers. Now play with your feathers to get a feel for how you want them to look on the barrette.
Grab your felt and one of your feathers. If your feathers are going to overlap like mine, start with the one that will be on the bottom. BEFORE adding any glue, lay it on the felt to get a feel for where the glue should go and how to get the feather to sit just where you want it. Once you put the glue down you're stuck (get it?). So, practice.
It's time for the glue gun! I don't know about you, but I've always loved these things, despite all the burns I've gotten from them over the years. Put down one diagonal stripe of glue roughly where the center line of the feather will be once it's placed.
You don't have much time before the glue cools, so place your feather fast! Press it gently to make sure it stays, but don't wiggle it around. Feathers are delicate, and you can get breaks in the eye pattern.
Now, do the same for the second peacock feather.
You are now ready for the rhinestones. Once again, before you glue anything, place them on the feathers to get an idea for how you want the pattern to look. I also like to use pliers to pick them up, as my fingers tend to drop things a lot.
Put a little dab of glue on the flat side of the rhinestone and place it on the feather.
Lather, rinse, and repeat for the rest of your stones.
Put your peacock feathers pretty-side down, so the felt is facing up, and grab your barrette. Put a line of glue across the barrette, put it on the felt and press down.
For added security, cut a thin strip of felt and slide it under the part of the barrette that sticks out, and glue the ends down.
And you're done! The end result should look something like this:
That's it! For nicer photos of the final product, check out my etsy store.
Labels:
barrette,
etsy store,
feathers,
how to,
pics
Monday, January 2, 2012
Organization
I recently moved. And, by 'recently' I mean 8 weeks ago. Boyfriend and I are still living out of boxes, because we were ambushed by the holidays and therefore could not unpack. I'm slowly finding all of my supplies and the items I had finished before the move. It hasn't been fun, and some of my things didn't survive the transition. Feathers are fragile, man.
It has recently come to my attention that I am an adult, and as such I should be more organized. This has nothing to do with new year resolutions, I swear. The first thing that needs organization is my etsy stuff. I know better, from my own experience, and the experiences of others, that it is dangerous to get too excited about this sort of thing. I figured I would start small, with a way to deal with my earrings:
Nice, right? I don't have that many earrings left, as they sold way better than I was expecting. I'm going to use the extra spaces for the necklaces. The best way for me to stick to an organizational plan is to make it idiot proof. This qualifies. Put tack in board. Hang item from tack. Feel smug. These are all things I can do. Now, if you'll excuse me, I'm going to sit back and think about how awesome being an organized adult is.
Subscribe to:
Posts (Atom)